How to Use a Vacuum Sealer, Step by Step
To use a vacuum sealer, pick a bag made for your machine, seal one end, fill the bag without wetting the open edge, then vacuum and seal the other end. Check the seal before you freeze the food.
On this page (11 sections)
- What a vacuum sealer does before you start
- Step 1: Choose the right bag or roll
- Step 2: Cut the bag and seal the first end
- Step 3: Fill the bag without wetting the seal
- Step 4: Pick the mode for the food
- Step 5: Vacuum, seal and check the edge
- What a good seal looks and feels like
- Step 6: Label and store the sealed bag
- Common mistakes when you learn to use a vacuum sealer
- How to clean the bar and lid after each batch
- How to use a vacuum sealer well every time
Here is how to use a vacuum sealer: choose a bag made for your machine, seal one end, fill the bag without wetting its open edge, then vacuum and seal the other end. Check the seal before you freeze the food.
This guide walks through a basic external sealer, the countertop type that uses rolls or pre-cut bags. The steps are the same on most models, but the buttons and modes differ, so check your manual for the exact settings.
A wet or dirty bag edge is a common cause of weak seals, so keep that edge dry at every step.
What a vacuum sealer does before you start
A vacuum sealer pulls the air out of a bag, then seals the open end with a heat bar. Removing the air slows freezer burn, so a good seal matters more than the speed of the cycle.
Before the first bag, read the manual and find the seal bar, the lid latch, the mode buttons and the roll storage. Knowing where each control sits makes the first batch go much faster.
Keep the machine on a flat, dry counter, away from the sink and the stove.
Step 1: Choose the right bag or roll
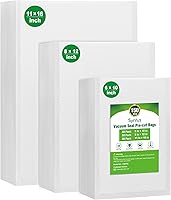
Use bags or rolls made for your machine. An external sealer needs a textured surface to pull air through the bag, so smooth bags won't work on most models.
Check the bag width against the seal bar. A bag wider than the machine accepts won't seal, and a narrow bag can leave food outside the seal.
Our guide to which side of a textured bag goes up covers bag placement.
If you have a roll machine with a built-in cutter, the roll is the most flexible choice. A machine such as the FoodSaver FM2100 stores its roll inside the body and cuts it to length.
Step 2: Cut the bag and seal the first end
Cut the bag to length, leaving room at the top for the seal and for the air to pull out. A bag that's too short leaves no room for the seal, and one that's too long wastes material.
Lay the bag across the seal bar with the open end on the outside. Close the lid, then press the seal button to seal the first end.
Let the seal cool for a moment before you move on. Check that the seal is flat and complete before you fill the bag.
Step 3: Fill the bag without wetting the seal
Put the food in the bag and leave a few inches of room at the open end. Don't pack the bag so tight that food can reach the seal area.
Wipe the open edge dry before you seal it. Juice, marinade or crumbs on the edge are a common reason a seal fails.
For wet food, freeze it first or use a chamber machine if you have one. An external sealer struggles with liquid, and the liquid can pull into the seal.
Step 4: Pick the mode for the food
Use dry mode for foods with no moisture, such as dried fruit, grains or crackers. Dry mode pulls air with the least risk of liquid reaching the seal.
Use moist mode for raw meat, fish and produce that carry some water. Test a new cut with a small bag first, since juice can vary by food.
For meat in particular, see dry or moist setting for vacuum sealing meat.
Use a double seal mode for wetter foods if your machine has one. A gentle vacuum setting, if your model has it, helps soft foods such as bread or berries keep their shape.
Test any new food with a small bag first. That catches a wrong mode before you use a full roll.
Step 5: Vacuum, seal and check the edge
Run the vacuum and seal cycle, and let the machine finish before you open the lid. Opening it early can break the vacuum and leave a loose bag.
Check the finished seal. It should be flat, smooth and free of wrinkles, with no gap along the edge.
If the seal looks weak, cut the edge short, reseal and check again. A bag that won't pull tight may have a bad seal or a leak, so don't freeze it until it looks right.
What a good seal looks and feels like
A good seal is flat across its whole width, with no wrinkles, no gaps and no bubbles along the line. The bag should look tight around the food without bulging at the seal.
If the bag feels soft or the seal line looks wavy, treat it as a weak seal and reseal it before you freeze the food. A quick second pass costs less than a bag of thawed meat.
Step 6: Label and store the sealed bag
Label each bag with the food and the date before you freeze it. Use the oldest bag first, and keep a simple list on the freezer door if that helps.
Vacuum sealing is not a substitute for refrigeration or freezing. It removes air, but it doesn't kill bacteria or make food safe on its own, so freeze sealed food at 0 F or colder.
Low-acid foods like raw meat, mushrooms, cooked rice and garlic in oil can grow botulism bacteria without air, so never leave them sealed at room temperature. For meat and other perishable foods, read USDA guidance at foodsafety.gov before you store anything for a long time.
Common mistakes when you learn to use a vacuum sealer
A wet or dirty bag edge is one of the most frequent mistakes. Dry the edge with a paper towel before every seal, and keep the seal bar clean.
Another mistake is overfilling the bag. A full bag pushes food toward the seal and can cause a weak seal or a bag that bursts in the freezer.
A third mistake is using the wrong mode. Start with dry or moist, and move to a double seal only for wetter food on a machine that offers it.
How to use a vacuum sealer without weak seals
A wet edge is a common cause of a weak seal. Liquid, sauce or meat juice on the edge can stop the seal from bonding, so the bag doesn't close tight.
Wipe the edge dry, then seal again. If the seal still fails, check the bar for crumbs and the lid for a proper close.
Soft foods that crush
Soft food, such as bread, berries or a cake, can crush under full vacuum. A gentle vacuum setting or a light fill helps, so the food keeps its shape.
How to clean the bar and lid after each batch
Wipe the seal bar and the lid gasket after each batch, once the machine has cooled. Crumbs and food residue can stop the bar from sealing evenly.
Keep the roll storage and the cutter clean too. Check the manual for the right cleaning method for your model before you use water or cleaner.
How to use a vacuum sealer well every time
To use a vacuum sealer well, choose the right bag, keep the edge dry, pick the mode for the food and check every seal. Those four habits prevent many of the common problems.
Once you've used the machine a few times, the steps become routine. Start with simple dry foods, then move to meat once you trust the seal.
For the problems that come up after a few months of use, read our vacuum sealer not sealing guide. For the big picture on choosing a machine, read our food vacuum sealer pillar guide.
Frequently asked questions
How do I use a vacuum sealer for the first time?
Read the manual, then practice on a cheap bag with dry food, like a bag of rice. Seal one end, fill the bag, vacuum and seal the other end, and check the seal before you try meat.
Why is my vacuum sealer not sealing the bag?
Common causes are a wet or dirty bag edge, a wrinkle across the seal bar, or a lid that isn't fully closed. Wipe the edge dry, lay the bag flat and try again with a fresh edge.
Can I use the same settings for every food?
Dry mode suits dry food, and moist mode suits foods with some moisture. A double seal mode suits wetter food on machines that offer one, so test each new food with a small bag first.
How do I know the bag is sealed properly?
A good seal is flat, smooth and free of wrinkles, with no gap along the edge. If the seal looks weak or the bag doesn't pull tight, cut the edge short, reseal and check again.