Vacuum Sealer for Deer Meat: Kitchen Prep and Bags
A vacuum sealer is a good way to pack deer meat for the freezer, as long as the meat stays cold. Use a moist setting for ground meat, pick roll bags that fit the large cuts, and freeze the packs at 0 F or colder.
On this page (8 sections)
A vacuum sealer removes most of the air around the meat, which slows freezer burn. That makes it a practical way to pack deer meat for the freezer.
This guide covers the kitchen side only: trimming, chilling, bagging and freezing.
Start with clean, chilled meat, not warm meat from the counter. Trim any loose fat and silver skin, cut the meat into the portions you cook, and keep the pieces cold until they go in the sealer.
Vacuum sealing is not a substitute for refrigeration or freezing. It doesn't make meat safe on its own, so the steps below keep the meat cold and packaged well, and the freezer does most of the work.
Trim, portion and chill before you seal
Trim the loose fat and any silver skin with a sharp knife. Those parts can turn rancid over time, and trimming them gives the bag less to hold.
Cut the meat into the sizes you'll cook. A steak-sized piece for a quick pan dinner is easier to thaw than a whole roast, and a roast divided into two or three pieces freezes faster.
Chill the cut meat in the refrigerator before you seal it. A cold piece takes the seal more evenly, and a warm piece can leave moisture in the bag.
Pat the surface dry with a paper towel. Juice on the bag's open end can stop the seal from forming, so wipe any wet spots before you place the meat in the machine.
Work in batches so the meat stays cold. Take out only what you're sealing, and return the rest to the refrigerator while you work.
Vacuum sealer for deer meat: choosing bags and rolls
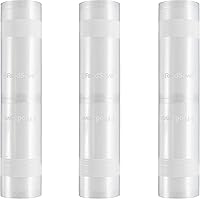
Large cuts need a wide roll. An 11 in wide roll covers a roast or a big steak, and you can cut the bag as long as the cut needs.
Our best vacuum sealer bags roundup covers the rolls and pre-cut packs.
Ground meat and small portions go into pre-cut quart bags or a quart-sized cut from a roll. Flatten ground meat in the bag before you seal it, since a flat pack freezes faster and stacks neatly.
Leave a clear margin at the open end, so the seal sits on bag and not on meat. A bag that's packed to the edge can make the seal weak.
Dry or moist setting for deer meat
Use the moist setting for ground meat and for any cut with juice or a marinade. The moist setting helps the seal form when liquid is near it.
Dry cuts, like a roast or a steak with little moisture, go on the dry setting. If your machine picks the mode for you, it will switch on its own.
For a full comparison, read vacuum seal meat dry or moist. It walks through the settings and the cuts they suit.
Which machine suits deer meat
Vacuum sealer for deer meat: machines that suit
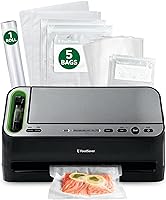
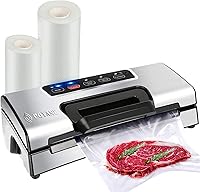
A machine with a moist setting and built-in roll storage fits this job best. The roll cutter lets you size each bag to the cut, which saves film on a large batch of portions.
If you seal a lot of ground or marinated meat, a machine with an extra moist setting and a gentle mode helps. Those settings keep the seal clean when there's juice.
For the roll, a long roll of 11 in bags covers most big cuts, and two rolls in one pack give you a steady supply.
For a broader list of machines for meat, see our best vacuum sealers for meat roundup.
If you process a whole season, compare the best vacuum sealers for hunters too.
Label, date and freeze the packs
Write the cut, the weight and the date on each pack before it goes in the freezer. A label makes it easy to find the right cut, and it helps you use the oldest packs first.
Freeze the packs flat, in a single layer, until they're firm. Then stack them.
Keep the freezer at 0 F (-18 C) or colder, which the USDA's Food Safety and Inspection Service gives as the freezing target, per its freezing and food safety guidance.
Keep a freezer thermometer inside the freezer. A thermometer tells you more than the dial does, since it shows the real temperature.
Thawing and food safety
Thaw sealed meat in the refrigerator, in a bowl or on a tray, so any juice stays contained. Don't leave a sealed pack on the counter, since vacuum-sealed low-acid food left at room temperature can grow the bacteria that cause botulism.
Cook the meat to the temperature the USDA lists for that type of meat. Use a food thermometer to check the center of the thickest piece.
Vacuum sealing slows freezer burn and some spoilage, but it doesn't kill bacteria. USDA says food held at 0 F stays safe and only loses quality over time, so use the oldest packs first and follow USDA guidance for how long each cut keeps its best quality.
Where chronic wasting disease is a concern, follow your state wildlife agency's advice on testing before you process or eat the meat.
Check each seal before freezing
Check each seal before you freeze the pack. A wrinkled or thin seal can let air back in, so reseal the bag after you trim the edge.
If a machine keeps failing, check the bag, the gasket and the bar. Our vacuum sealer not sealing guide walks through the common fixes.
Keep it cold, from the counter to the freezer
Cold meat and a cold freezer are the two things that matter most. Keep the meat chilled while you trim and portion, and get each pack into the freezer soon after sealing.
For the wider picture on vacuum sealers, start with the food vacuum sealer pillar. It explains how external and chamber machines differ, and which one suits your meat.